
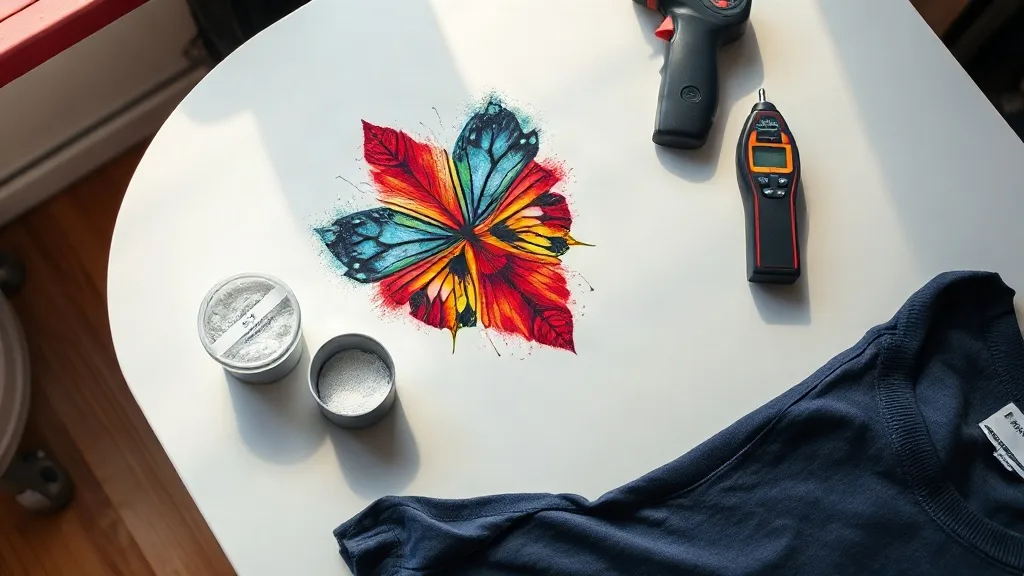
Walk into most small print shops today and you will find a heat press that used to sit idle between vinyl jobs. Over the past few years, dtf transfers have quietly taken over a big share of that press time, and for good reason. They let a two-person operation offer full-color, photographic-quality prints on cotton, poly blends, and even canvas without investing in a dedicated screen printing setup or a closet full of specialty inks.
But there is a gap between ordering a sample pack and running DTF as a reliable part of your business. This guide is about that gap. It covers the things shop owners actually wrestle with: how to store film so it does not curl, why your powder is clumping, which press settings to start from, and how to decide whether to print in-house or buy finished dtf sheets from a supplier.
What Actually Happens Inside a DTF Transfer
A DTF transfer is a printed film with a thermoplastic adhesive powder fused to the wet ink. When you press it, the powder melts into the fabric fibers while the ink layer stays on top. That is why DTF works on materials that direct-to-garment printing struggles with, and why the hand feel is different from screen print or vinyl.
The process has four moving parts, and each one can fail independently:
- Printing: pigment ink laid onto a PET film coated with a release layer.
- Powdering: hot-melt adhesive powder shaken over the wet print.
- Curing: heat that melts the powder into the ink and drives off moisture.
- Pressing: a second heat cycle that bonds the transfer to the garment.
Most problems people blame on "bad film" or "cheap powder" actually trace back to one of these four steps being slightly off. Once you understand the sequence, troubleshooting becomes a process of elimination rather than guesswork.
Film Storage Is the Most Underrated Skill
Printed film is hygroscopic. It pulls moisture out of the air, and that moisture is the enemy of a clean press. If you have ever peeled a transfer and watched half the design stay stuck to the carrier sheet, you have met this problem.
Keep it flat, dry, and dark
Store printed film in a sealed bag or a lidded plastic bin with a desiccant pack. Lay it flat rather than rolling it, because a curled sheet will not make even contact with the platen. Keep the bin away from windows and away from the press itself; the ambient heat around a press is enough to soften film over a few days.
Mind the clock
Freshly printed film presses best within a few days. If you are printing a large batch ahead of a busy season, test one sheet from the bottom of the stack before you commit a whole order to it. A quick test press on scrap fabric takes two minutes and saves a lot of swearing.
Powder and Curing: Where Quality Is Won or Lost
The powder step looks simple and is not. You want an even coat with no bare patches and no thick drifts. Shake from a height of roughly 20 to 30 centimeters in a steady rhythm, then tilt the film and let the excess fall back into the container. Tap the back of the sheet lightly to knock off loose grains.
Curing temperature depends on your powder, but most hot-melt adhesives in common use want a surface temperature in the 160 to 170 degrees Celsius range. A cheap infrared thermometer is worth more than an expensive press upgrade here. Measure the actual film surface, not the oven display, because they are rarely the same number.
Signs of under-curing: the powder looks grainy and rubs off with a fingertip, and the transfer cracks after a few washes. Signs of over-curing: the film curls hard, the ink looks dull, and the transfer becomes brittle. If you are between the two, slightly under-cured is easier to rescue with a second pass than overcured film.
Press Settings to Start From
Every press runs a little differently, so treat these as starting points and adjust from there:
- Temperature: 150 to 160 degrees Celsius for most garments.
- Pressure: medium to firm, enough that you can see the fabric texture through the film.
- Time: 10 to 15 seconds for the first press, then a short second press of 5 seconds after peeling.
- Peel: warm peel for most films, cold peel for some. Check your supplier's spec sheet rather than guessing.
Use a pressing pillow for zippers, seams, and small items. On a flat platen, a seam will create a pressure shadow that shows up as a faded line through the design. A pillow raises the print area so the seam sinks in instead.
Printing In-House vs. Buying Finished Sheets
This is the decision that shapes your workflow more than any press setting. Printing in-house gives you speed on repeat orders and control over color, but it means buying a printer, maintaining it, and dealing with clogged heads on Monday mornings. Buying finished transfers from a supplier removes the equipment headache but adds lead time.
A useful middle ground: print your high-volume, repeat designs in-house and buy finished transfers for one-off jobs, oversized prints, or anything with a color profile you do not want to chase. That way you are not turning down work while you learn your printer's quirks.
How to judge a supplier
Ask three questions before you commit to a bulk order. What powder do they use, and at what cure temperature? What is their turnaround on reprints when something goes wrong? Can they send a sample of the exact film and powder combination you will receive in production? A supplier who answers all three clearly is usually a supplier worth keeping.
Finding a Reliable Source Close to You
Shipping time matters more than most people expect when a customer is waiting on a single shirt. Searching for dtf transfers near me is a reasonable starting point, but treat distance as one factor among several. A supplier two hours away with a two-day turnaround beats a supplier twenty minutes away that takes a week. Ask about local pickup, and ask whether they will run a test order at production settings before you send a large file.
If you are sourcing for a shop that handles rush orders, build a relationship with two suppliers rather than one. The second supplier is your insurance policy for the week your primary runs out of a film size or has a printer down.
Wash Testing Without a Lab
You do not need a testing facility to know whether your transfers hold up. Print a small test sheet with your standard settings, press it onto the same fabric you use for customer orders, and run it through five home wash cycles at 40 degrees, inside out. Check the edges for lifting and the surface for cracking after each cycle. Log the settings you used. Over a few months, that log becomes the most valuable document in your shop.
Frequently Asked Questions
Can DTF transfers be pressed onto dark garments?
Yes, and this is one of the format's real advantages. The white ink layer sits under the color, so dark shirts do not require a separate white underbase step. Just make sure your press pressure is even, because white ink shows pressure inconsistencies more readily than color does.
Why does my transfer look glossy after pressing?
Gloss usually means too much heat or too long a press. Try dropping the temperature by 5 degrees or shortening the press by 2 seconds and compare. Some films are naturally satin, so check a sample from a previous batch before you change settings across the board.
How long do unused DTF transfers last?
Stored flat, sealed, and away from heat and humidity, most transfers remain usable for several months. Humidity is the main variable, so a desiccant pack in the storage bin does more for shelf life than any other single habit.
Do I need a special press for DTF?
No. A standard clamshell or swing-away heat press works, provided the platen is flat and the pressure is adjustable. The two upgrades that genuinely help are a pressing pillow for seams and an infrared thermometer for checking film surface temperature.
What causes a transfer to peel at the edges after washing?
Edge lifting almost always points to uneven pressure or under-curing. Check that the whole design received full contact, then verify your cure temperature with a thermometer rather than trusting the display. A short second press after peeling also helps seal the perimeter.